目次
開発環境
- Ruby:version 3.1.2
- Ruby on Rails:version 7.0.4
- Visual Studio Code:version 1.73.0
- OS:Windows10
Ruby on Railsでトップページの作成手順
Ruby on RailsでWebアプリケーションを作成するうえで欠かせないのが、ユーザーが一番最初にみるトップページです。
今回はメモアプリの作成で使用した「トップページの作成」のコードを用いて解説していきます。
トップページのコントローラーの作成
まずはトップページのコントローラーを作成していきます。
1 | rails g controller homes |
Ruby on Railsでトップページのコントローラ名は「homes」とされることが多いため、今回の実装でもコントローラー名は「homes」としています。
1 2 3 4 5 6 7 | class HomesController < ApplicationController before_action :logged_in?, only: [:top] def top end end |
トップページ用のtopアクションを追加しておき、before_actionでログインしている状態かを確認するメソッドが実行されるように記述しておきます。
このあたりの仕様はWebアプリケーションによって調整しましょう。
トップページのルーティングの作成
次にトップページのルーティングを作成していきます。
1 2 3 | Rails.application.routes.draw do root :to => 'homes#top' resource :users, only: [:new, :show, :edit, :create, :update] |
前回までは「root :to => 'memos#index'」としていましたが、今回はトップページを作成したので「root :to => 'homes#top'」へ変更しています。
トップページを変更したい場合は、ルーティングの「root :to => 'コントローラー名#アクション名'」を変更しましょう。
トップページの画像を準備する
次にトップページの画像を準備します。
今回は「memo_app\app\assets\images」フォルダ内に「mv.jpg」というファイル名でファイルを追加しています。
画像保存場所については、ユーザーがファイルを投稿して表示するような場合は「memo_app\public」に保存されるような処理が推奨されています。
今回はアプリケーション側で事前に準備している画像なので「memo_app\app\assets\images」フォルダ内に保存しています。
トップページのビューとレイアウトの作成
次にトップページのビューとレイアウトを作成します。
1 2 3 4 5 6 7 8 9 10 11 12 13 14 15 16 17 18 19 20 21 22 | <div class="wrapper"> <div class="container mv-image"> <div class="mv-imag-transparent"> <div class="top-container"> <div class="col-box-1"> <h2>ようこそMemoAppへ!</h2> </div> <div class="col-box-1"> <p>MemoAppは、無料で利用できるメモアプリです。</p> <br> <p>いつでも、どこでも、思いついたらすぐに記録することができるシンプルな機能を提供しています。</p> <br> <p>ぜひ、ご活用ください。</p> </div> <div class="col-box-1"> <%= link_to "新規登録", new_users_path, method: :get, class: "btn-100 green-color" %> <%= link_to "ログイン", new_sessions_path, method: :get, class: "btn-100 blue-color" %> </div> </div> </div> </div> </div> |
CSSのclassについては事項でご紹介します。
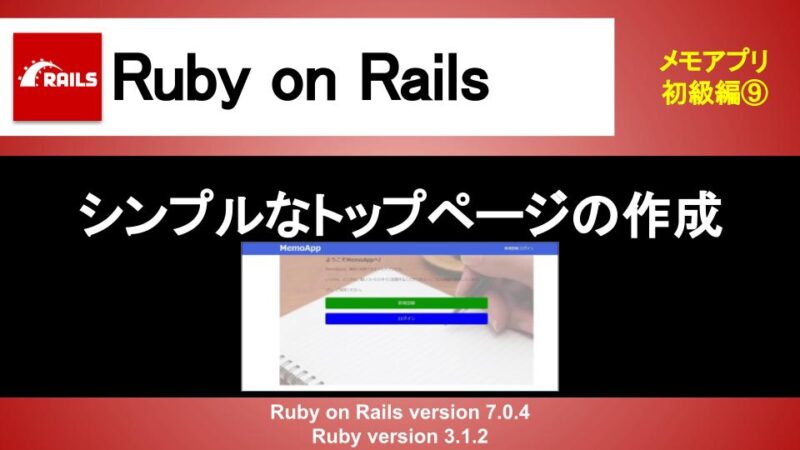
ポイントとしてはメインビジュアルに背景画像を使用するため、containerの中に背景画像を指定している形です。
その後のレイアウトとしては背景画像を透過するためのレイアウト「mv-imag-transparent」、その中にテキストを表示するためのレイアウト「top-container」という構成にしているところです。
14 15 16 17 18 19 20 21 22 23 24 25 26 27 28 29 30 31 | <div class="wrapper header-color"> <div class="container flex-between"> <div class="header-left"> <h1><%= link_to "MemoApp", root_path, method: :get %></h1> </div> <div class="header-right"> <% if @current_user.nil? %> <%= link_to "新規登録", new_users_path, method: :get %> <%= link_to "ログイン", new_sessions_path, method: :get %> <% else %> ログインユーザー:<%= @current_user.name %>さん <%= link_to "登録情報", users_path, method: :get %> <%= link_to "ログアウト", destroy_sessions_path, method: :delete %> <% end %> </div> </div> </div> |
また、ヘッダーのロゴにあたる部分もリンクになるように調整しておきましょう。
トップページのデザインの調整
次にトップページのデザインの調整をしていきます。
17 18 19 20 21 22 23 24 25 26 27 28 29 30 31 32 33 34 35 36 37 38 39 40 41 42 43 44 45 46 47 48 49 50 51 52 53 54 55 56 57 58 59 60 61 62 63 64 65 66 67 68 69 70 71 72 73 74 75 76 77 78 79 80 81 82 83 84 85 86 87 88 89 90 91 92 93 94 95 96 97 98 99 100 101 102 103 104 105 106 107 108 109 110 111 112 113 114 115 116 117 118 119 120 121 122 123 124 125 126 127 128 129 130 131 132 133 134 135 136 137 138 139 140 141 142 143 144 145 146 147 148 149 150 151 152 153 154 155 156 157 158 159 160 161 162 163 164 165 166 167 168 169 170 171 172 173 174 175 176 177 178 179 180 181 182 183 184 185 186 187 188 189 190 191 192 193 194 195 196 197 198 199 200 201 202 203 204 205 206 207 208 209 210 211 212 213 214 215 216 217 218 219 220 221 | * { padding: 0; margin: 0; box-sizing: border-box; color: #696969; font-size: 16px; font-family: sans-serif; list-style-position: inside; } /* トップページ用のCSS */ .mv-image { background-image: url("mv.jpg"); background-position: center; background-size: cover; height: 600px; } .mv-imag-transparent{ background-color: rgba(255, 255, 255, 0.4); width: 100%; height: 100%; } .top-container { margin: 0 auto; width: 100%; max-width: 760px; } /* ヘッダー用のCSS */ .header-color { background-color: #4169e1; } .header-left { color: #ffffff; display: inline-block; line-height: 60px; } .header-left a{ text-decoration: none; color: inherit; font-size: 36px; } .header-right { color: #ffffff; display: inline-block; line-height: 60px; } .header-right a{ text-decoration: none; color: inherit; } .green-color{ background-color: green; } .blue-color{ background-color: blue; } .red-color{ background-color: red; } .notice-text { color: #ffffff; font-weight: bold; text-align: center; padding: 10px 0; } h1 { font-size: 36px; color: #ffffff; } h2 { font-size: 24px; } h3 { font-size: 24px; } .wrapper { width: 100%; } .container { margin: 0 auto; width: 100%; max-width: 1170px; } .col-box-1{ width: 100%; padding: 6px; } .col-box-2{ width: 50%; padding: 6px; } .col-box-3{ width: 33.3%; padding: 6px; } .col-box-4{ width: 25%; padding: 6px; } .flex-start { display: flex; flex-wrap: wrap; justify-content: start; } .flex-between { display: flex; flex-wrap: wrap; justify-content: space-between; } .memo-header { width: 100%; padding: 6px; min-height: 40px; background-color: #ffd700; border-radius: 6px 6px 0 0; } .memo-center { width: 100%; padding: 6px; min-height: 100px; background-color: #fffacd; } .memo-footer { width: 100%; padding: 6px; background-color: #ffd700; border-radius: 0 0 6px 6px; text-align: center; } .memo-other { width: 100%; padding: 6px; text-align: right; } .form-box { background-color: transparent; border: 1px solid #d3d3d3; border-radius: 6px; padding: 6px; width: 100%; } .search-box { background-color: transparent; border: 1px solid #d3d3d3; border-radius: 6px; padding: 6px; width: 30%; } textarea { min-height: 80px; } .btn { border: 1px solid #d3d3d3; border-radius: 6px; padding: 3px 12px; } .btn-100 { color: #ffffff; border-radius: 6px; padding: 12px 12px; display: inline-block; width: 100%; font-size: 1.2em; text-align: center; text-decoration: none; margin: 10px 0; } .field_with_errors { display: contents; } |
今回は「memo_app\app\assets\images」フォルダ内に画像をファイルを保存しているため、「background-image: url("mv.jpg");」で画像のURLを指定しています。
画像を保存する場所によって画像ファイルのURLは異なるため、画像の保存場所によって適切なURLを読むこむようにしておかないと画像が表示されないということになる点は注意が必要です。
メモコントローラーのリダイレクト先を修正
最後にメモコントローラーのリダイレクト先を修正しておきます。
9 10 11 12 13 14 15 16 17 18 19 20 21 22 23 24 25 26 27 28 29 30 | def create @memo_new = Memo.new(memos_params) @memos = Memo.all if @memo_new.save redirect_to memos_path else render action: "index" end end def update @memo = Memo.find(params[:id]) @memo.update(memos_params) redirect_to memos_path end def destroy @memo = Memo.find(params[:id]) @memo.destroy redirect_to memos_path end |
今回、トップページを作成したので、メモの作成、メモの更新、メモの削除で指定していたリダイレクト先も整えておきます。
おわりに
Ruby on Railsでトップページの作成について解説してきましたが、いかがだったでしょうか。
ユーザーがどのようなWebサービスなのかを理解しやすくするためにも、Webアプリケーションだけに限らずトップページの作成は重要なページとなります。
是非、トップページだけに限らずユーザーにとって有益な情報となるページの作成に挑戦してみてください。
